How To Make Ribbon Animation In After Effects
How To Make Ribbon Animation In After Effects

Introduction to Afterward Effects Timeline
After Furnishings is one of the nearly of import graphics editing and designing software of Adobe systems that works on editing video graphics, nosotros have different types of sections on the working screen of this software, making our piece of work easy in this software. Each section has a dissimilar purpose. Timeline is 1 of the of import sections of this software. This section helps united states in the monitoring of keys and frames of any video footage or any blitheness with its different handling parameters. Here we will sympathise the reach points of the Timeline sections of this software with an example. And so let usa start our discussion.
How to Utilise Timeline Sections in Later Furnishings?
Timeline is an important section of this software, so we will discuss it in a very good way along with the layer section of this software because these two panels work together. But earlier discussing them, let us accept a look at sections of this software.
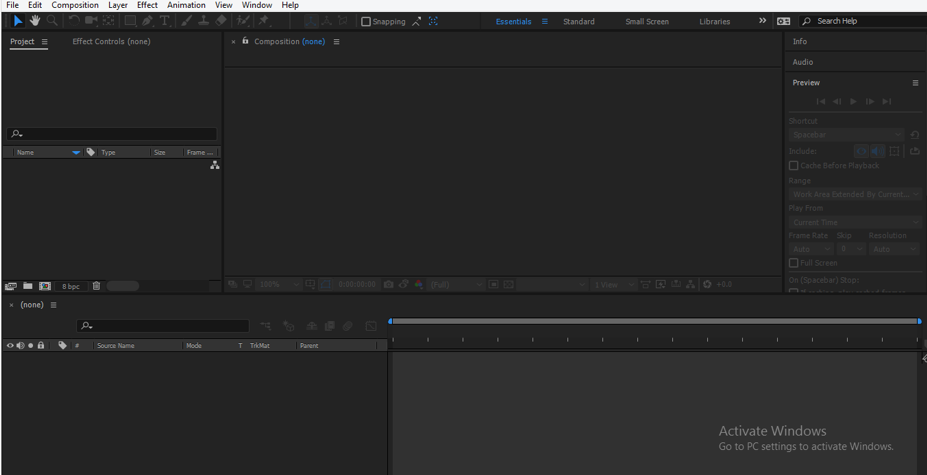
Step 1: At the top of the working screen, there are 2 ribbons; i is the Menu bar, and the other is Toolbar; below this, there are three sections that are Project panel at the left side of the working screen, the Composition window at the middle of the working screen and Parameter sections at the right of the working screen, below these sections there are two sections that are Layer panel at the left side of bottom screen and Timeline panel at the right side of bottom end. You can make your working screen past adjusting the place of these sections according to your requirements.
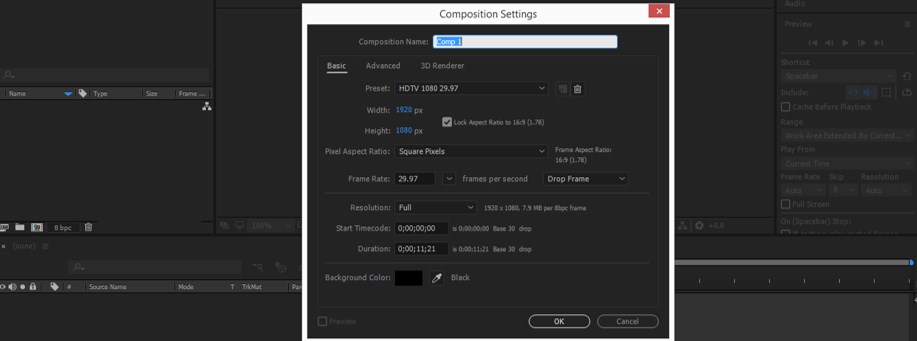
Step ii: Let us now have a New Composition for our learning. For 'New Composition, become to the Composition menu of the Menu bar, which is at the top of the working screen. A drop-downwards list will be open up once you click on this sub-menu; click on the 'New Composition choice of the drop-down list.

Stride three: In one case you click on this selection, a Composition settings dialog box volition be open. Make your desired settings here in this box and press the Ok button of this dialog box for applying the settings.
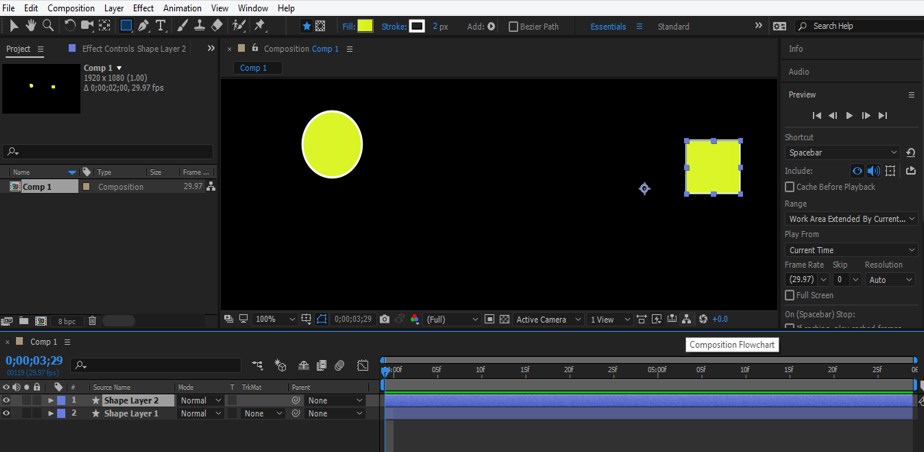
Step 4: Now, let us take an Ellipse tool from the tool panel of this software by click on it with the mouse button.

Step five: And depict a circle like this with this tool.

Pace 6: Now, take the Rectangle tool from the tool panel of this software by click on it and depict a rectangle in a new shape layer like this with this tool.
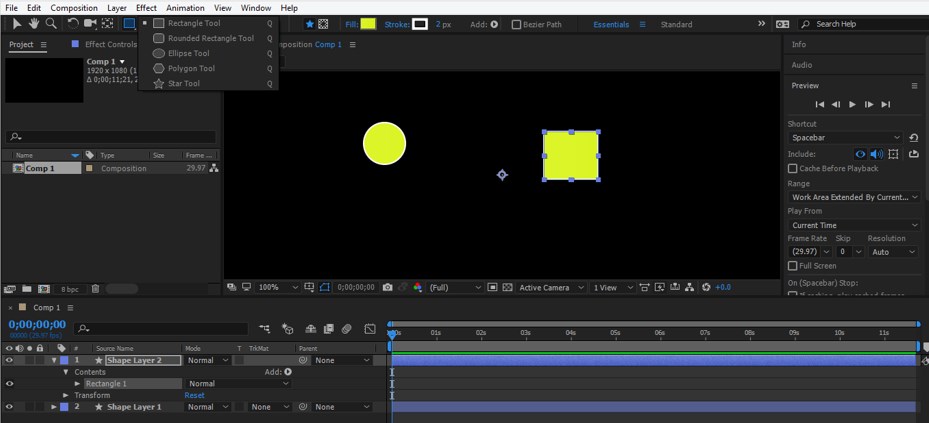
Step 7: Now, come to the Layer panel; we have 2 layers in the layer panel of this software, which is at the bottom terminate of this software, and Timeline at the right side of this Layer section.

Step 8: This is the Timeline indicator through which we ready time, frame, and key for animating backdrop of our object or for editing our video footage.

Step 9: This ruler is known as the Time ruler, which shows you lot the time and frame rate of animation fabricated by you.

Step ten: This bar shows you the working surface area of your animation and the last end of this ruler called Work Area End.

Stride xi: You can adjust it by dragging the pointer indicator by the mouse push button when the pointer indicator comes at the end of this ruler.

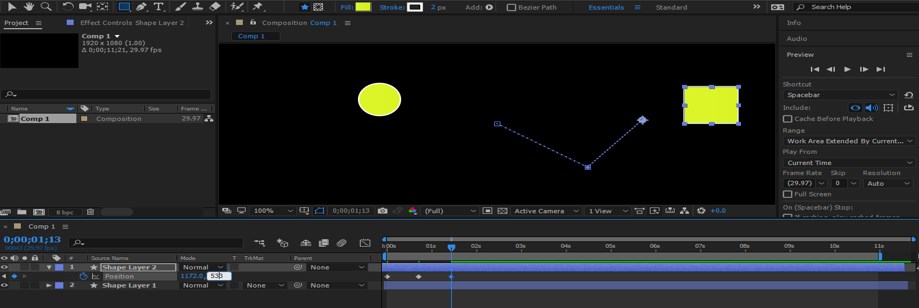
Footstep 12: You tin add a primal in the timeline section of animative your object by click on the pocket-size arrow icon of the shape layer similar this.

Step thirteen: Now, I will press P from the keyboard of opening the Position belongings of this layer so identify the Time indicator head at some seconds and change the value of the Position property of this layer.
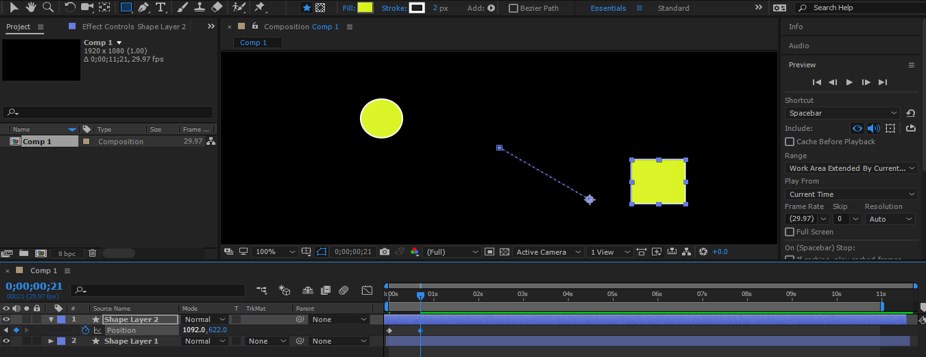
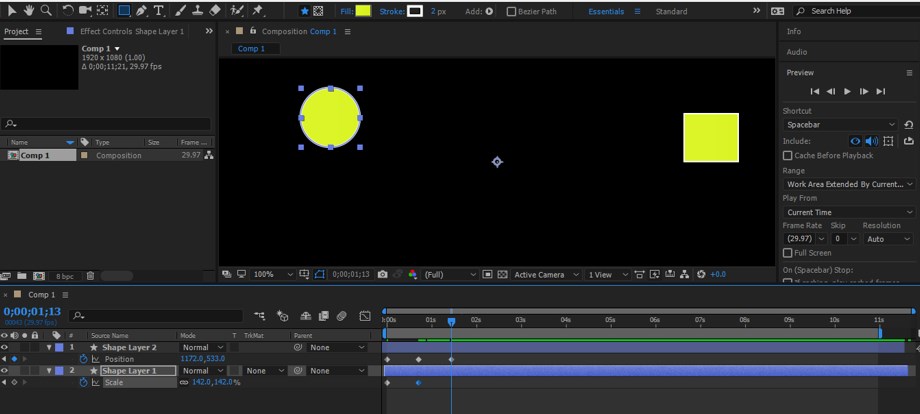
Step 14: In the same way, you can add together more and more cardinal for animating the object.
Step 15: Same as you tin add together keys in another layer of this composition.
Step 16: Now, you lot can see the blitheness by playing it. For playing it, printing the keyboard's Space bar, or you lot can go to the Preview tab of the Parameters section of this software for playing the animation.
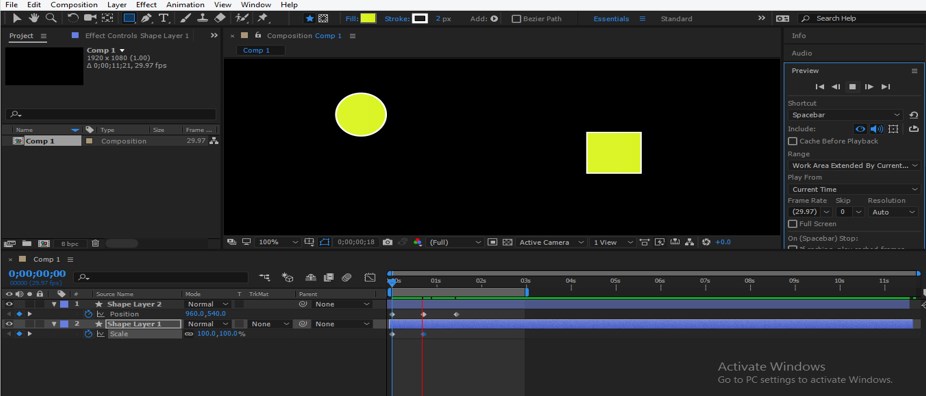
Step 17: Yous tin can zoom out or zoom in the Timeline work surface area by dragging this bar with the mouse button.

Step 18: If you want to start the starting time layer from 3 sec, then place the time indicator head at 3 sec, select this first layer, so printing the '[' button from the keyboard.
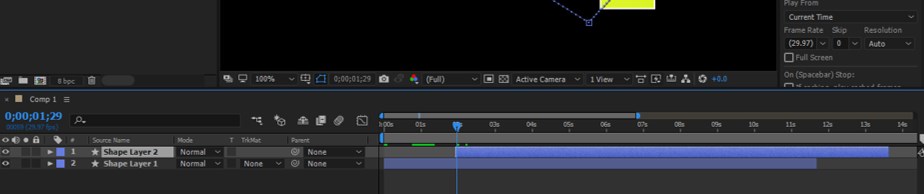
Step 19: You want to stop that layer at 3 sec and so printing the ']' button from the keyboard.

Footstep 20: Or yous can but hold the bar of this layer with the mouse push button and drag it to that place where you want to identify it.

Step 21: If yous desire to trim any layer in two parts, then selected that layer and press Ctrl + Shift + D button from the keyboard. One time you press these buttons, and then the layer will exist trim like this.

Step 22: You can select whatsoever one of the trim parts and delete it if you don't want it by pressing the Delete button from the keyboard.

Pace 23: If you lot desire to first your work area from any detail frame, then it is very simple; for example, I want to outset my work expanse from 3 sec in the timeline, then I will place the time indicator at 3 sec and press the B push button from the keyboard.
.
Pace 24: Reverse to this, if I desire to end my work area at three sec, then I will place the fourth dimension indicator at iii sec and press the Due north button from the keyboard.

Step 25: Now, if you want to expand your selected work area, then make correct-click on that surface area with the mouse button. A drop-downward list volition exist open up like this; choose the 'Trim Comp to work area' option of the drop-downwardly list.

Step 26: And your selected area volition be expanded similar this.
These are all near the Timeline console of Later Effects software. You will become more knowledge about this panel slowly once you start working on this software.
Decision
Now, after going through this article, yous can empathize 'what is Timeline in After Furnishings software', and y'all can analyze different features of this department of Later on Effects software by practicing on information technology. Y'all must know all about the Timeline panel of this software because information technology is very important to base part on this software'southward working.
Recommended Articles
This is a guide to Later Effects Timeline. Here we hash out an introduction, how to apply Timeline in Subsequently Effects in a step past step fashion. You lot can likewise become through our other related articles to learn more than –
- Keylight in Afterward Furnishings
- Background in After Furnishings
- Export in Later on Effects
- Photoshop Font Effects
DOWNLOAD HERE
How To Make Ribbon Animation In After Effects
Posted by: stoneshost1978.blogspot.com
0 Response to "How To Make Ribbon Animation In After Effects"
Postar um comentário